Saturday, 20 April 2013

French Country Loaf

>


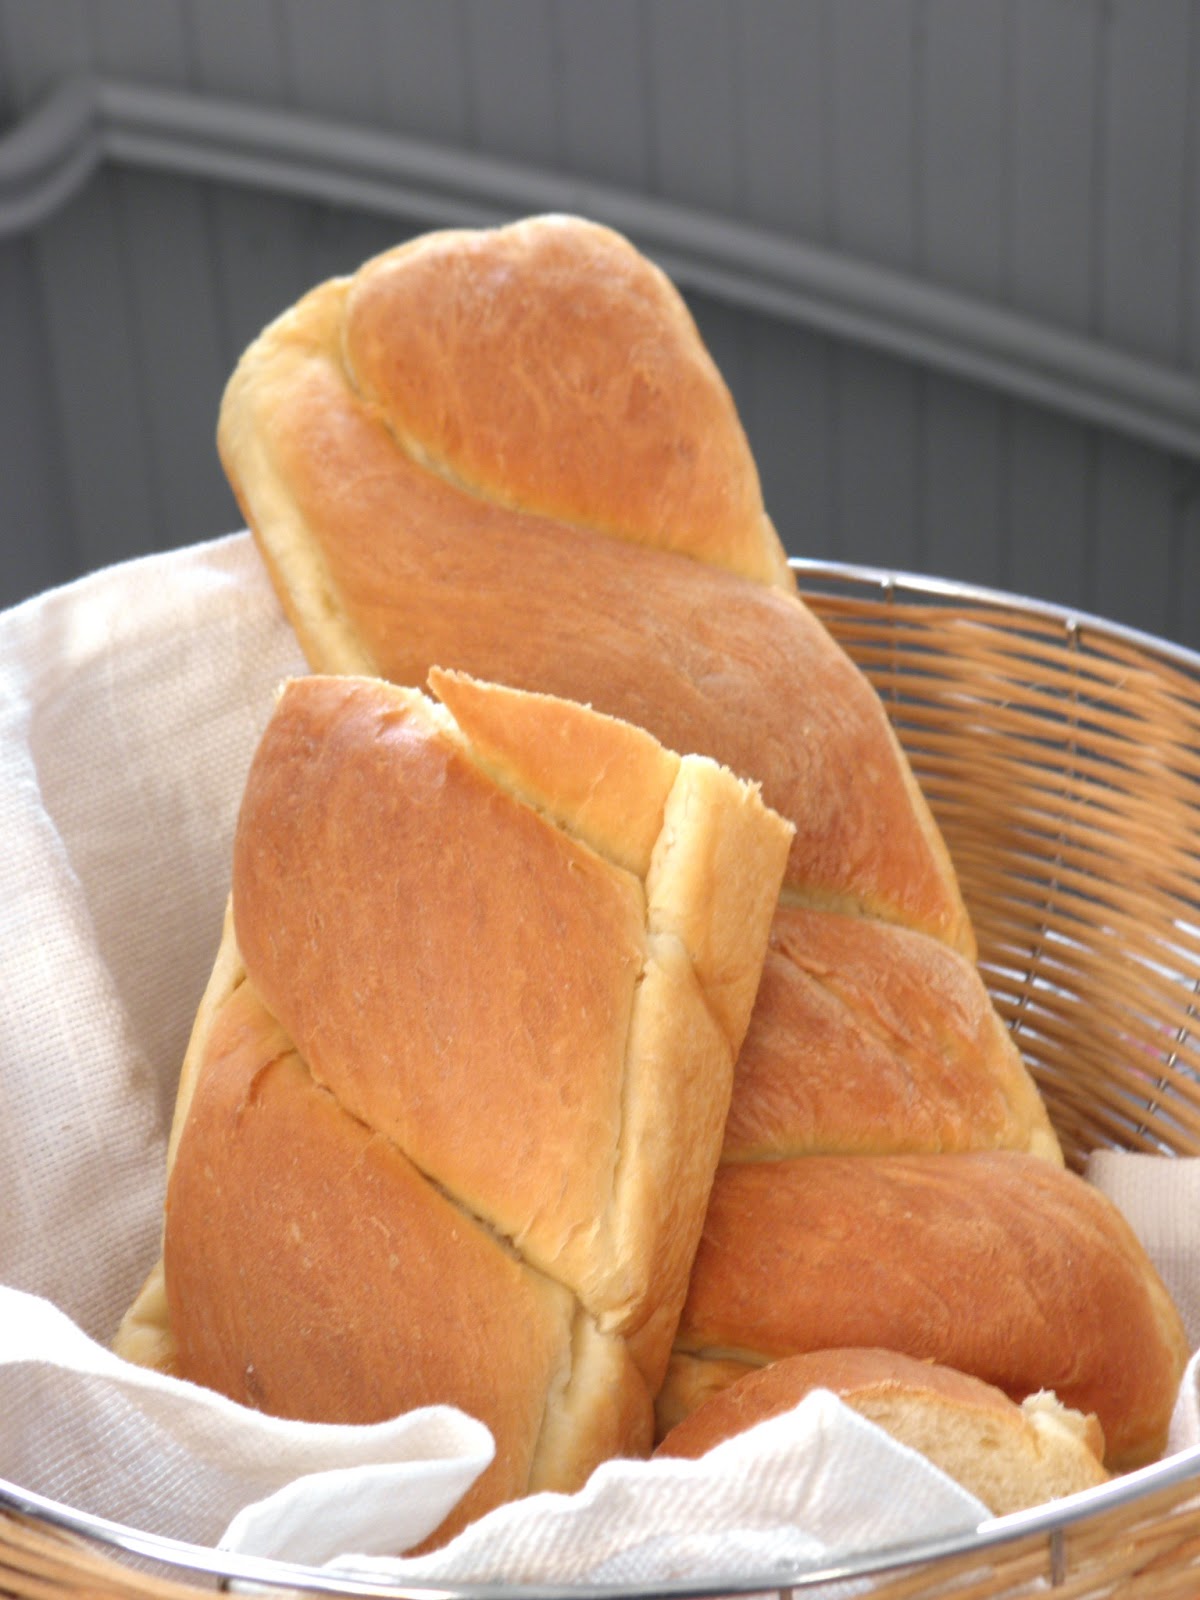
Welcome spring with the fragrance of freshly baked French loaves. You will never want to have store bought bread after you have baked this fluffy and light bread.


Dear readers, you are welcome to a new and improved blog! My apologizes for taking so long to construct this blog. A lot of factors made this blog hang in the middle for so long, which is sad. Time has really flied away and spring is again around the corner spreading light and sunshine to the gray and cold days. I can't believe it is about three quarters of a year since I blogged my last recipe on this delicious Lemon Curd. I will make no promises, but I will try to update my blog more often and fill it up with some delicious and mouthwatering recipes. So you should look forward to some yummilicious baking.

This time I want you to feel the smell of homemade loaf right out from the oven. Is not the freshly baked bread spreading amazing fragrance and love into your home? There is not much to be compared with a slice of freshly baked bread with a dollop of butter melting like honey on the warm bread. Now, that is what I call the taste of love.


I love to make things self. I am more of a DIY person, and as far as it is possible, I try to make everything from scratch. There is nothing that can be compared with the feeling that you get when you know that this is something you have put your love and effort in making, but sadly not everyone understand that. Baking bread at home is not difficult or time consuming as some people may think. Rather, it is so easy and the bread almost makes itself. Make the dough, let it rise, shape it and let it rise again for then to be put in oven for baking. And it tastes a thousand times better than any store-bought bread.


I remember the amazingly soft French land loaf topped with poppy seeds that we used to buy from Sweden many years ago. I think that was the best loaf I have ever had in my life from the store. The loaf was so light as feather and the texture was like soft wool. I don't know if they stopped the production or what, but it is no longer to be found. I really miss that loaf. And that may be one of the reasons why I have tried to search for French loaves on Google which resembles that one loaf, but it has not been easy. However, I found recipes for French loaf in a Swedish baking book; one for loaf with hard crust and the other one for loaf with soft crust. I tried to bake the French loaf with soft crust and it turned out to be great. It was not exactly as the one loaf I remember, but it was delicious and light in texture. Usually we buy bread at the store, but when everyone tasted this loaf, they asked for more and realized how dull and plain store bought loaf actually is.


This is my second attempt on the French loaf with soft crust. First time I made it without using any bread tin and the loaves raised on the flat side, but they were amazingly soft and delicious. The second time I let them raise in bread tins and they raised beautifully high.

So let's welcome the spring with the fragrance of freshly baked bread!

Makes 2 large breads

I n g r e d i e n t s

50 g yeast
50 g margarine/butter
5 dl milk
2 tsp salt
2 tsp sugar
ca. 10 - 14 dl all-purpose flour

You can either make this bread by machine or by hands

Grease two oblong bread tins about 25 x 10 cm

1. Crumble the yeast into a mixing bowl (if you are using dry yeast as I did, then mix it with the flour and set aside - follow rest of the instrcutions as described apart from #3)
2. Melt the fat, add in the milk and heat until the mixture reaches 37 C
3. Add a little of the fat/milk mixture into the yeast and stir to dissolve it
4. Add the remaining fat/milk mixture, salt, sugar and most of the flour (do not put all flour in once, add little by little until you have a very soft and sticky dough - sometimes you need far less than what the recipe requires) Keep aside 1-2 dl of the flour for later use)
5. Work the dough vigrously until it is smooth and release from the bowl (knead about 10 min if using hands, 7 min if using machine)

Sprinkle a thin layer of flour on the dough and let it raise under a baking cloth or wrap it in a plastic bag for about 30 minutes or until doubled in size (it may take up to 1 hour depending on where you have placed it to raise)


6. Knead the dough on lightly floured surface until it is smooth and not sticky (add a little more flour as needed)
7. Divide the dough in 2 or 3 parts
8. Divide each dough in two halves and roll them to about 30 cm long sausages
9. Pinch the edges of the two sausages and twist them over each other and pinch the edges to seal the sausages
10. Repeat with the remaining dough
11. Have the twisted breads into the prepared bread tins
12. Cover with a baking cloth and let raise for about 30 minutes to 1 hour or until doubled in size
13. Brush lightly with some milk if you want to add poppy seeds

Bake the breads on the lowest slot in a preheated oven at 200 C for about 25 - 30 minutes or until they are golden brown in color and there is a hollow sound when you tap on the bread

Brush the baked loaves with some milk and let them cool covered with a baking cloth on rist


STORAGE: In the bread box or in a plastic bag for about 1 week. In the freezer for about 6-9 months

The smell of good bread baking, like the sound of lightly flowing water, is indescribable in its evocation of innocence and delight.” - M.F.K. Fischer


Freshly cut loaf..


ready to be enjoyed!


Mmmmm..

Monday, 23 July 2012

Lemon Curd

>

Sweet and sour lemon butter with a creamy and silky smooth consistency. Delicious in cakes, tarts or simply as a spread on a slice of bread.


I have always been skeptical to lemony stuff. Maybe because it reminds me of the double sandwiched lemon buiscuits mom used to buy in large packings when we were younger or maybe it is just something with lemon and baked goods that do not click together. But I was wrong and stupid. Lemon is one of the most delicious flavor you can have in cakes, cookies and other desserts. The first time I tasted lemon curd was when I was making lemon tartlets for my brother-in-law, and on that very first time tasting lemon curd, I fell in love with it.


I have tried many recipes for lemon curd in order to achieve a perfect creamy and silky smooth texture which was not runny and watery. For my very first attempt of making lemon curd, my brother-in-law was not all satisfied with the consistency of the lemon curd and the amount of sugar was also less, but all in all it was not that bad. The second time there was also problems with the consistency which did not seem to hold the shape even though I did put a lot of egg yolks and plenty of corn starch (maizena) and the color turned to be pale rather than yellowish. I tried to put some yellow coloring a few times, but the color either became too intense or too false.


I searched a lot for a good lemon curd recipe on net and in books and all the one I tried turned out to be too runny. I even had to cheat once when the lemon curd was very runny by mixing some vanilla cream to it and actually it was not a bad attempt as my brother-in-law approved it (without knowing what I did to it). Atleast it was holding the shape and had a thick consistency. After a lot of failed attempts, I still did not want to give up. I was determined to find a good recipe and achieve the perfect consistency of lemon curd. A lot of googling resulted in a video-recipe which seemed to be different in the making method than other recipes which were based on cooking all the ingredients together. This method was very different as it started with beating the butter and sugar together until creamy and pale and then adding the egg yolks until blended well just as if you were baking a cake. The creamy mixture was then transferred to a sauce pan and then heated up while stirring constantly. At first it seemed like nothing was happening, but then you can see the creamy mixture change into a creamy curd and it gets thick very quickly so it is best to remove from heat once it gets a little thick.


So was it the perfect lemon curd recipe I was looking for? Yes, this recipe did wonders. The lemon curd turned to be smooth and creamy and had a firm consistency which could be piped out without the use of any corn starch or the like. Only four ingredients (equal amount); sugar, butter, egg yolks and lemon juice, and you have the most delicious lemon curd to use as filling, topping or just on a toasted slice. Finally, I had a recipe which gave me what I wanted and I have used this recipe and method a few times now and it always gives a firm and creamy curd. And it amazes me how pretty and bright yellow color the lemon curd turned into without using any food coloring. The lemon curd was too delicious and I could not stop myself eating from it while it was cooling. However, my brother-in-law and sister thought it should be more sweet, so I will try to add more sugar next time and see how it goes. For me, the sweetness was just perfect according to my taste.


Some lemon curd recipe ask for way too much lemon juice. I have experimented a little and I think about 1/2 dl is the maximum for a recipe with 80-100 g of butter. I add little by little to check the taste and stop adding when the taste is lemony enough to please the palate. Otherwise the taste becomes too intense and too sour. Also remember to always use fresh lemon juice only as the bottled lemon juice is stronger and gives a very sour and bitter taste to the lemon curd which ruins the taste.


So, lemon curd made me fall in love with lemon as a ingedients in baking. Little did I know before tasting this delicious lemon butter that lemon could be amazing as a ingredient in baked stuff. Lemon Meringue Pie is one of my favorite pies now, I remember I ate half of the pie when I made it. So yummilicious! Recipe will come soon.


Makes enough to fill a lemon pie, about 22-24 cm


I N G R E D I E N T S

100 g butter
100 g sugar
100 g egg yolks (about 5)
0,3 - 0,5 dl lemon juice, freshly squeezed


1. Beat the butter and sugar together until creamy and pale in color
2. Add in the egg yolks, one at a time, beat until blended well
3. TRansfer the mixture to a medium sized sauce pan and place on medium heat
4. Let heat up while stirring constantly and till it just starts to thicken (do not let it become too thick as it will thicken more when cooling)
5. Remove from heat and transfer to a bowl or jar

Let cool and use as desired

Sweet and delicious lemond curd..


with a smooth and creamy texture


So good in cakes, pies and tarts


or just as it is with a spoon!

Saturday, 30 June 2012

Smarties Cake

>

A moist chocolate cake covered with chocolate icing, chocolate bars and colorful chocolate bunties. Drown yourself and the kids in chocolate!


My cute little niece's second birthday cake! A little children's colorful dream in all the rainbow's colors and ofcourse it has to be chocolate. Last year my sister asked me to make a Hello Kitty cake, and this year she told me to make something very childish, but not a princess or pinkish cake, instead she wanted a colorful birthday cake which would please the childrens eyes. I was thinking of making a chocolate cake with some piped butter cream on top and maybe some colorful decorations, but then I remembered to have seen this smarties or Kit-Kat cake on Google before and I knew what I was going to surprise my niece with.


This Smarties cake has all the elements a kid would desire; chocolate, chocolate and chocolate. Yes, it is a pure chocolatey cake with a chocolate cake as base, covered with chocolate icing and decorated with Kit-Kat bars all around and topped with smarties (chocolate bon bons) in some lovely colors and finished off with a huge ribbon in bright pink as the final touch. VoilĂ , there you have an amazing cake!


In addition to this cake, I made a pavlova with cream and strawberries also since my mom and dad does not love chocolate as much as we do! I think everyone had a piece of each as the Smarties cake could be too chocolatey and the light pavlova balanced it well.

My little niece sat on the window with the cake as I was trying to shoot pictures of her, and she was looking so excited while she could not hold herself anymore and carefully reached her hand to pick up the smarties on the cake and pull off one of the kit-kat's. Kids are such cutie pies!! Haha, not only kids are excited when they see these kind of eye-candies. Even my older and younger siblings had big problems with keeping their hands off the cake, trying to steal some smarties and kit-kat and guess how angry I got on this. Grow up!


For the chocolate cake I used my favorite chocolate cake and chocolate icing recipe which I doubled in quantity. As for the kit-kat bars I had planned to use Kvikk Lunsj which are similar to Kit-Kat's, but have far better quality and taste (they are Norwegian of course, hehe), but I ended up with Kit-Kat as I found them in Sweden as a large packing with 10 Kit-Kat bars and I just bought them. My siblings thought Kvikk Lunsj would have been best. Smarties were chosen because they have some lovely and bright nice colors compared to other brands. I had to cut my Kit-Kat's in half as my cake was not high enough and when I tried to use whole Kit-Kat's it just looked wierd because they were so long and the Smarties would not have been visible. If you use a smaller baking form and have a higher cake then it would be fine to use whole Kit Kat's, but otherwise it is absolutely fine to trim to desired length according to the cake. Ideally you want them just above your cake, about 1 cm or half inch.


Makes about 8-10 servings


I N G R E D I E N T S

2 quantity chocolate cake recipe (for large cake 22-24 cm or 1 quantity recipe for small cake 18 cm)
1 1/2 quanity chocolate icing
8-10 Kit-Kat or Kvikk Lunsj bars (with four bars in each)
2 large boxes (250 g) of Smarties or Non-Stop (chocolate bunties)


A S S E M B L I N G

1. Have the cooled chocolate cake on a serving plate
2. Prepare the icing according to the recipe and set aside
3. Divide all the Kit Kat bars and trim them to fit the cake (about 1 cm above the cake)
4. Spread the icing on the top of the cake and decorate with Smarties
5. Spread rest of the icing all around the sides and quickly press Kit Kat bars side by side all around to make a fence
6. Finish off with a nice ribbon in bright color around the cake

PS: Work quickly with the Smarties and Kit-Kat as the icing may dry quickly


Mmmm.. pure chocolatiness!


Indulge in chocolate, chocolate and


more chocolate!


Friday, 29 June 2012

Battenburg Cake ~ Daring Baker's Challenge, June 2012

>

A luxury two colored Victoria cake, sandwiched together with apricot & peach jam and dredged with Marzipan. A real English royal cake.

I have not been able to participate in the daring baker's challenge for some months now. Partly caused by all the bready challenges that has been up now and I am more of a sweet person, so I was waiting for some sweet treats and actually there was one in between all the bread stuff (before the last month, I think) and I made the Armenian nazook which made really good company to tea. I wrapped some of them in cellofan and gave away to some friends I was sleeping over at that weekend. I really wanted to bake the challah loaf last month, but due to lack of time, I could not make it. But when I saw this month's challenge; Battenburg cake, I was pretty sure that this time I would not miss the challenge.


Contradictory to others, Battenburg cake is not a new term for me. I am quite familiar with this royal cake and have been making this delicious cake for about 5 years now on special occassions. I think my first attempt was in 2007 and I have a post up on that one here. Battenburg cake is very much loved in my family and my brother-in-law has also become a enthusiast since he tasted it and that time it really turned out amazing and he keep mention that. This English royal cake was introduced to me by my favorite baking book "Cakes & Cake Decorating" by Rosemary Wadey and has now become one of our favorite cakes and whenever we are having some "finer" guests, this cake is usually a priority.

This time also I made this cake to some special guests we were having and I wanted to make it the same day as I think this cake should be enjoyed while it is moist, soft and fresh (unlike cream cakes). I had time pressure and there was no apricot jam at home, so I baked the cake and then I rushed to the shop for some jam and finally managed to assemble the cake just before the guests arrived. I would prefer to decorate with some marzipan roses or royal icing, but due to lack of time I just kept it plain and planned to serve it already cut in slices. Thinking about it now, I could have made a lattice pattern with a knife and decorated with some white pearls in no time to give a more elegant look, but anyways it is too late to think about it now as the cake and guests both are gone.

This cake is always much appreciated by the guests. Last time I made it for some guests, this lady asked me how I had managed to assemble it as a cheque (explanations to her). Also this time the guests were much pleased by the cake. They really loved it and thought the cakes were bought and went as far as saying that these were some of the best cakes they have had. I guess that is candy for the ears and the best payment for anyone who loves to bake. Even one of my brothers said to me that it looks very simple, but when you take a bite of it, there are so many delicious flavors coming in your mouth; almonds from the marzipan, apricot and peach jam and lemon flavor from cake. A delight to hear such comments, and remembering myself that I would not be able to bake a single successful cake without the will of God, so all praise to Him, the One who has blessed me with this talent. Alhemdulillah.


I have seen many creative attempts by other bakers on daring baker's. Some have used different colors and flavors and many have used chocolate plastique to cover around the cake. I was impressed by some of the flavor combinations such as chocolate and mint which made so beauitulf together as a cheque design with dark brown and mint green colors. Maybe I will try these flavors some time, but I would personally never use chocolate plastique or anything else other than Marzipan around this cake as I think it gives the prettiest and neatest result and amazing taste to the cake and jam. This time I used a high quality jam, a blend of apricot and peach with a very high amount of fruit. It was one of the best apricot and peach jam I have tasted and absolutely different from the normal jam which tastes more like water and sugar.

Battenburg cake or "window" cake is made from moist Victoria sandwich cake in two colors and sandwiched together with delicious apricot and peach jam for then to be wrapped around a thick layer of marzipan. This very luxury and elegant cake can adorn any table on all type of special occassions. A little time consuming, but absolutely worth the patience.


Makes 1 large or 2 small cakes, 8-10 servings in each

I N G R E D I E N T S

150 g butter
150 g sugar
3 eggs, large
140 g all-purpose flour
1 tsp baking powder
1 tbsp water
pink food coloring
raspberry or lemon flavoring (optional)

100 g apricot & peach jam
225 g marzipan


Grease a deep oblong cake tin, about 28 x 18 cm / 11 x 7 inches, and line the bottom with greased (waxed) paper. Make a division across the centre of the tin with a double thickness of foil

1. Cream the butter and maragarine and sugar together until light and fluffy
2. Beat in the eggs one at a time, following each with a spoonful of flour
3. Sift in the remaining flour and fold in, followed by the water
4. Spread half themixture into one side of the cake tin
5. Add a few drops of pink food colouring and raspberry flavouring, if liked, to the remaining mixture
6. Put it in the other side of the tin

Bake in a moderately hot oven at 190 C / 375 F / Gas Mark 5 for about 25 minutes or until well risen and firm to the touch

Turn onto a wire rack to cool


A S S E M B L I N G

1. Trim the cakes to an even size and cut in half lenghtways
2. Spread the top of one white and one pink piece of cake with jam and top with alternate coloured pieces
3. Spread the sides of one double layer with jam and stcik the two pieces together to give the chequered effect
4. Use the remaining jam to brush all around the outside of the cake
5. Roll out the marzipan on a surface sprinkled with a little caster sugar, to an oblong large enough to enclose the whole cake ( approx. 35 x 25 cm / 14 x 10 inches)
6. Place the cake in the centre
7. Wrap the marzipan around the cake to cover it completely and trim


O P T I O N A L

Crimp or decorate the outer edges of the marzipan to give an even shape and mark a criss-cross pattern on top with a sharp knife. Sprinkle with a little more sugar and leave to set. Or make a rose with the marzipan rests to garnish the top. Serve cut in slices.


Monday, 18 June 2012

French Almond Cake

>


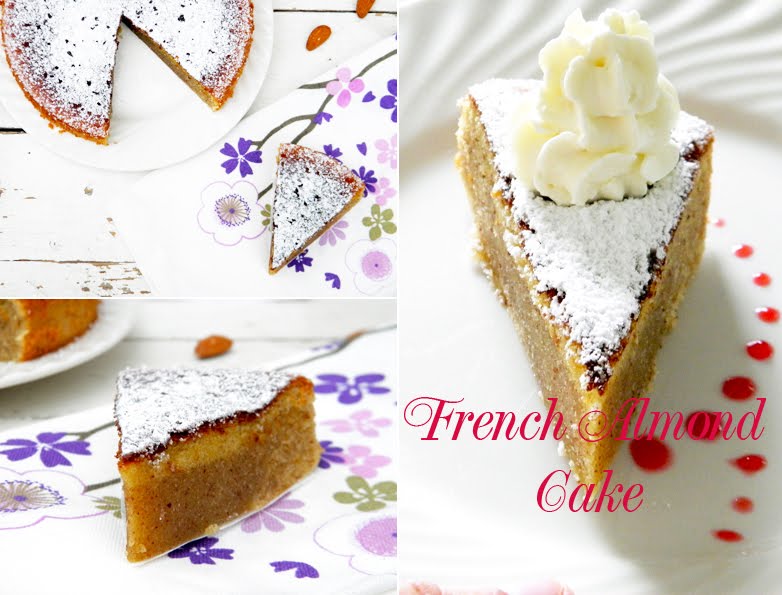
A very moist almond-flavoured cake with sugar topping. Have it simple or enjoy with freshly whipped cream and raspberry sauce.


14th June. 3 years and 1 month. The days are passing so fast, and another week is moving toward its end and I have still not managed to make the most out of the time I had, if anything at all. It is quite scary actually to think about it. The summer weather is everything but how a summer weather should be. After all, we are in Norway. It is almost obligatory to wear a jacket here all year around with the exception of around two weeks all in all were the sun smiles brightly also here in the north.


Today, I am tempting you with another French classic. It is an almond cake which I tried for the very first time a little while ago from the book "Cakes and Cake Decorating" by Rosemary Wadey. It is for sure my favorite baking book, a real old treasure. This book contains some of my favorite and best recipes.


This cake is very delicate and has a different texture, more like something between a cake on the edsges and a firm pudding in the centre. The eggs and ground almonds makes it really moist and results in a delicious almond cake which is served best lukewarm accompanied with whipped cream and raspberry sauce. This soft and nutty almond cake makes great company to tea and coffee.


Sometimes you wish to could hold on some moments forever. But noone can hold on the time, because it will run out of your hands just like sand no matter how tight you try to grab it. Life goes on, but memories can sit deep in your heart.

“For some life lasts a short while, but the memories it holds last forever.”
- Laura Swenson


Makes about 4-5 servings

I n g r e d i e n t s

100 g butter
150 g sugar
3 eggs, large
75 g almonds, ground
40 g all-purpose flour, sifted
almond essence (optional)
caster sugar / icing sugar for sprinkling

Grease an 18 cm / 7 inch deep sadwich tin or springform pan and grease the bottom and sides with greased/waxed paper

1. Cream the butter until very soft
2. Beat in sugar until the mixture is light and fluffy
3. Beat the eggs in one at a time, following each with a little of the ground almonds
4. Fold in the sifted flour and add a few drops of almond essence
5. Turn the mixture into the prepared tin

Bake in the centre of a moderate oven at 180 C / 350 F / Gas Mark 4 for about 50 minutes or until golden brown and firm to the touch

Turn onto a wire rack, sprinkle with caster sugar or icing sugar and leave to cool

Serve semi-warm with a dollop of whipped cream and raspberry coulis!


French almond cake..


Serve with freshly whipped cream


and raspberry sauce!


Tuesday, 5 June 2012

Queen of Sheba

>

Reine de Saba. A French classic almond and chocolate cake with a rich and creamy, silky smooth texture topped with chocolate glazing and almond slices. A delicious coffee treat.


It has been a while now since my last post, but it is really not easy to blog, study and work at the same time. In addition I have also been trying to redecorate my room for quite a while now, with still no success. Blogging needs time. A lot of time actually, and time is what I am running out of these days, or maybe for the last few months. But despite having no time at all, I have been able to bake a lot for some strange reason. Maybe baking does not need any time, it is done before you know it and then you realize it has taken your whole day. But this is how it is and it tells what your preferances really are. I have a loads of pictures and recipes waiting to be posted up and I have summer vacation from my studies so I will try to atleast blog once a week to keep the track, but no promises as working is not less tiring.


So, for about two and half week ago I finally gave this delicious chocolate cake a try. It was the month of May, almost the mid-dates and of course it had to be French. This cake is called "Reine de Saba" or Queen of Sheba and I have no idea how this cake connects to the Queen of Saba, but it is for sure a majestic cake. I had seen this cake for a while, but never really dared to try until this weekend I suddenly decided to make it and bring it to my sister's house were this cake was enjoyed with cold coffee.


This cake is Julia Child's version of the world famous chocolate cake and resembles a lot like the French chocolate cake, but has an addition of ground almonds and a different preparing method. The cake is glazed with chocolate icing and decorated with sliced almonds all around the cake. The cake is so simple too look at, yet there is something so elegant about it. It is amazing how some ivory almond slices can beautify the dark brown surface.


I loved the cake! It just fitted my taste buds so perfectly. So admirable. I even liked it more than the French chocolate cake I made a while ago and I am wondering why on earth I have not tried it out earlier! It was delicious; rich in taste and creamy in texture. The next day we had some guests and I served this cake, and I think I could hear one of them saying that they usually do not like chocolate cake, but this was an exception (I was in another room, so I am not sure, but I heard something like this and it was only one half piece left of the cake when they left, so yes). This recipe is by Julia Child and have a more complicated process, but there are recipes out there which are straight forward. However, if you have decided to try it out, then I highly recommend this recipe by Julia Child. It is absolutely worth a litte effort and time.

A cake worth a queen? Definitely!


Makes about 8-10 servings

I n g r e d i e n t s

2 tbsp coffee, diluted
120 g chocolate, dark
100 g butter
100 g sugar
3 egg yolks
3 egg whites
1 tbsp sugar
1 pinch salt
50 g almonds, ground
2 drops almond extract (optional)
50 g all-purpose flour


Butter and flour an round spring form, about 22 cm
Pre-heat oven at 170 C


1. Melt the chocolate and diluted coffee over hot water bath, set aside


2. Whisk the egg yolks together, set aside


3. Meanwhile cream the butter and sugar until light, creamy and fluffy, then add in the whisked egg yolks


4. Blend well (you want a creamy smooth texture)


5. Have the egg whites in a separate and clean medium sized bowl, add in one tablespoon of sugar and a pinch of salt


6. Whisk the egg whites until they form stiff peaks


7. Stir in the melted chocolate using a rubber spatula


8. Fold in finely ground almonds using a spatula


9. Immediately fold in 1/4 of the whisked egg whites to add volum to the batter


10. Sift in flour and egg whites alternatively in three sessions blending well after each


11. Nice and silky batter


12. Pour the batter in prepared form


Bake in the lower part of oven at 170 C for about 20 minutes or until a pin inserted comes out clean from the edge and oily from the middle (you want it to be a little wobbly in middle)


Glazing

75 g chocolate, dark.
30 g butter
1 tbsp coffee, diluted
15-20 almond flakes / sliced almonds for decorating

1. Blanch almonds and slice them in halves or just use almonds with their skin on and cut them in halves lengthwise
2. Melt the chocolate and diluted coffee over hot water bath
3. Add in butter and stir well
4. Fill a bowl with cold water and ice cubes
5. Have the melted chocolate bowl over the ice water (to cool down the chocolate mixture)
and stir until the consistency becomes thick and nicely smooth to spread over the cake
6. Spread the chocolate icing evenly on the cooled cake, around and on the sides
7. Press in one almond slice (with the white side out)slightly tilted all around the sides of the cake

Let set in the refrigerator preferably overnight or atleast 4 hours (as most of the cakes, this cake also improves taste the next day)

14 Mai, Trois ans and let me end this post with a quote..

"Nobody can go back and start a new beginning, but anyone can start today and make a new ending".
~ Maria Robinson

Love..


in one slice <3


Delicious..


Reine de Saba